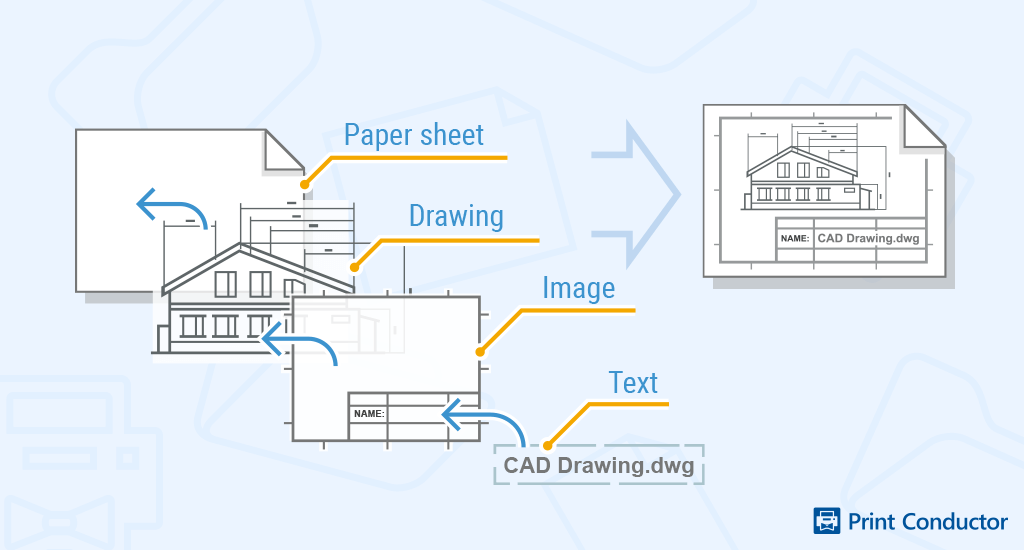
Need to add additional "layers" of data such as text, company letterhead, background image template, or a barcode to several documents before printing them? You can do it using Print Conductor watermarks and an Excel sheet – in just 4 easy steps.
Let's say, you have a list of documents that you want to apply watermarks to and then have these documents printed. There's also a list of text, image or barcode watermarks, each of which must match the relevant document. You can do it just by using Print Conductor and an Excel file.
How to add text watermarks and match them with relevant documents listed in Excel
To auto-match text watermarks with the documents before printing, follow these steps:
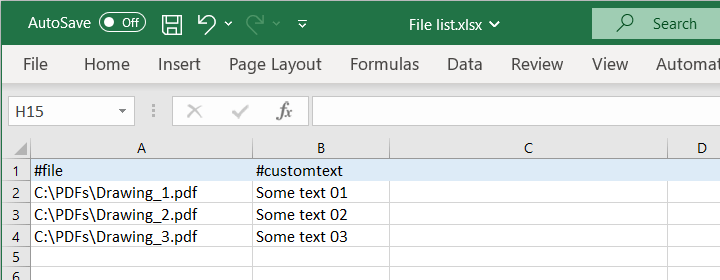
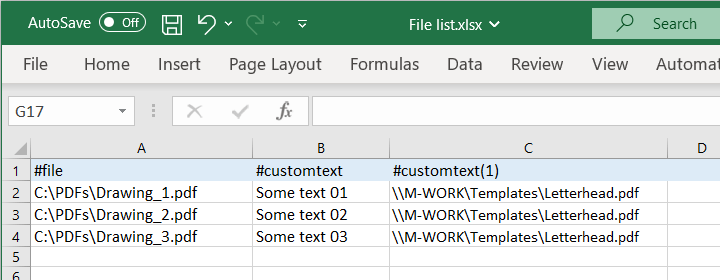
- Create an Excel spreadsheet will be later imported as a List of Documents. This Excel sheet should have the following header names (they must start with #):
- #file – paths to the documents you want to apply watermarks to. E.g., "C:\Users\[Username]\Desktop\Drawings\Drawing1.pdf"
- #customtext – enter some text that should be added as a Text watermark
In this sheet, rearrange the listed file paths and text strings for watermarking as you like so that they match correctly.
Save the Excel file.
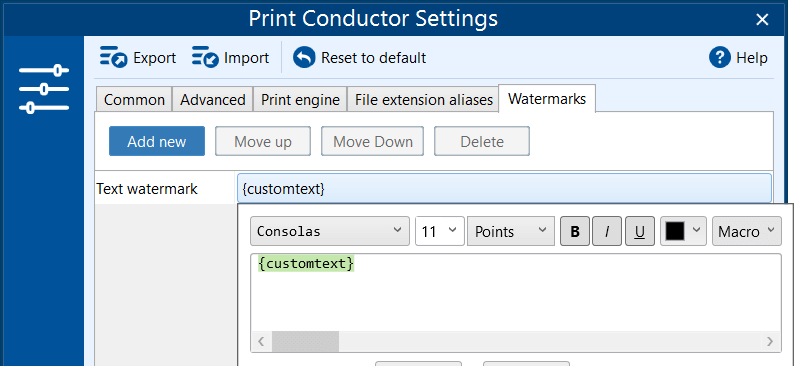
- Open Print Conductor Settings, go to the Watermarks tab and add a new Text watermark. Enter {customtext} macro (this macro will take the actual text from the Excel sheet you created). Click OK;
Here you may also change the watermark's position on a page – use Alignment and Offset settings.
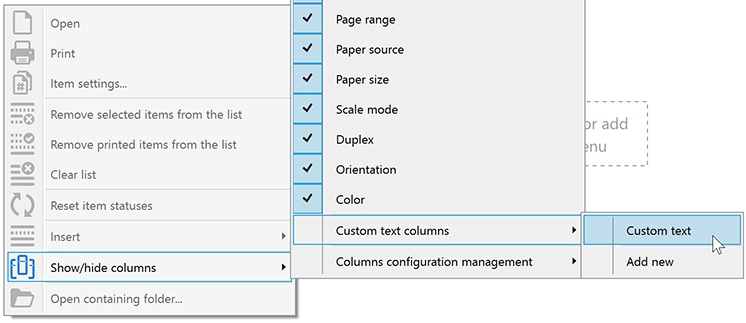
- Enable the Custom text column in the Print Conductor interface to make it visible. To do it, right-click the white space on List of Documents window → Show/hide columns → Custom text columns → click on Custom text;
- Import the previously saved Excel file to Print Conductor using the Import button and click Start Printing.
How to add background image and text to documents listed in Excel
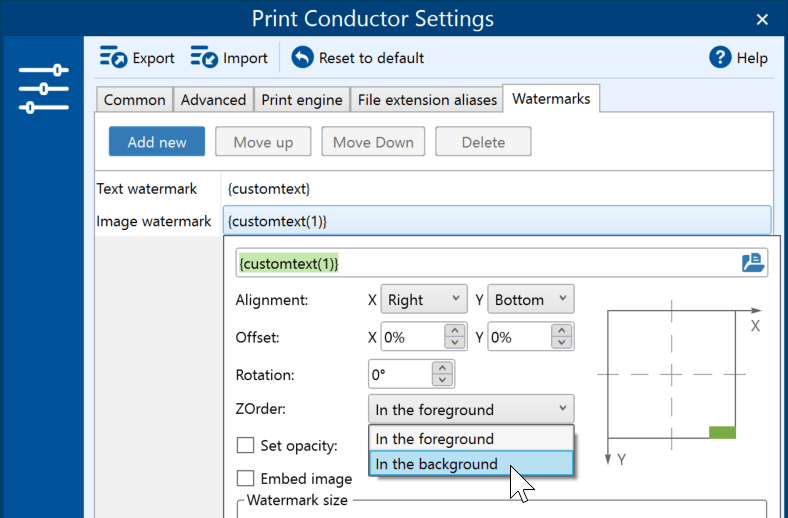
You may want to apply some image-based watermark (company letterhead, template, background image, etc.) to the documents plus add some text in the foreground. It is possible too. Again, everything should be listed in an Excel sheet and now we use two macros: {customtext} and {customtext(1)}.
In this case, you want to overlay one watermark on top of another. So, make sure that the image-based watermark is configured with ZOrder: In the background option turned on for proper Z-axis positioning.
How to add text, image, and a QR-code as watermarks to documents listed in Excel
Here's a more complex way to apply watermarking with Print Conductor. For instance, you want to add multiple watermarks: image watermark, text watermark, and a QR-code – and each must be applied to the relevant document.
Follow the same steps as mentioned above, but add more Excel headers and more types of watermarks in Print Conductor Settings. For example:
- #file – paths to the PDF documents you want to apply watermarks to. E.g., "C:\Users\[Username]\Desktop\Drawings\Drawing1.pdf"
- #customtext – for text strings to be used as a Text watermark (any text)
- #customtext(1) – for Image watermark to be added as a background
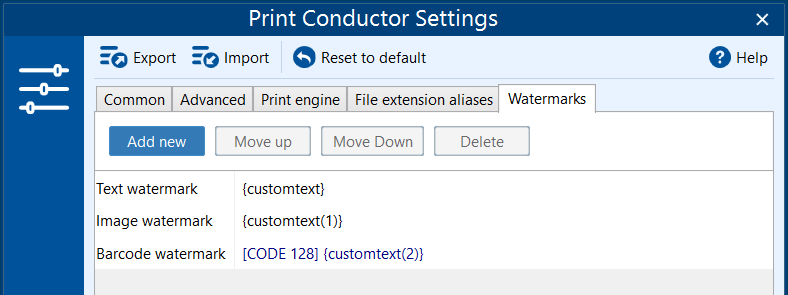
- #customtext(2) – for a Barcode watermark (e.g., a QR code) to be added in the page corner
Don't forget to add macros in Print Conductor Settings → Watermarks as well: {customtext}, {customtext(1)}, {customtext(2)}:
For each watermark, you can set its position on document pages using the Alignment and Offset settings.
Now that you know how to add more useful data to multiple documents and automatically match watermarks with documents, you can enhance your printing experience. If you have any custom requests regarding this topic, please don't hesitate to contact our customer support.

